

Featured Clinical Case: Connective Tissue Graft for Localized Gingival Recession
Featuring Dr. Arsalan Danesh
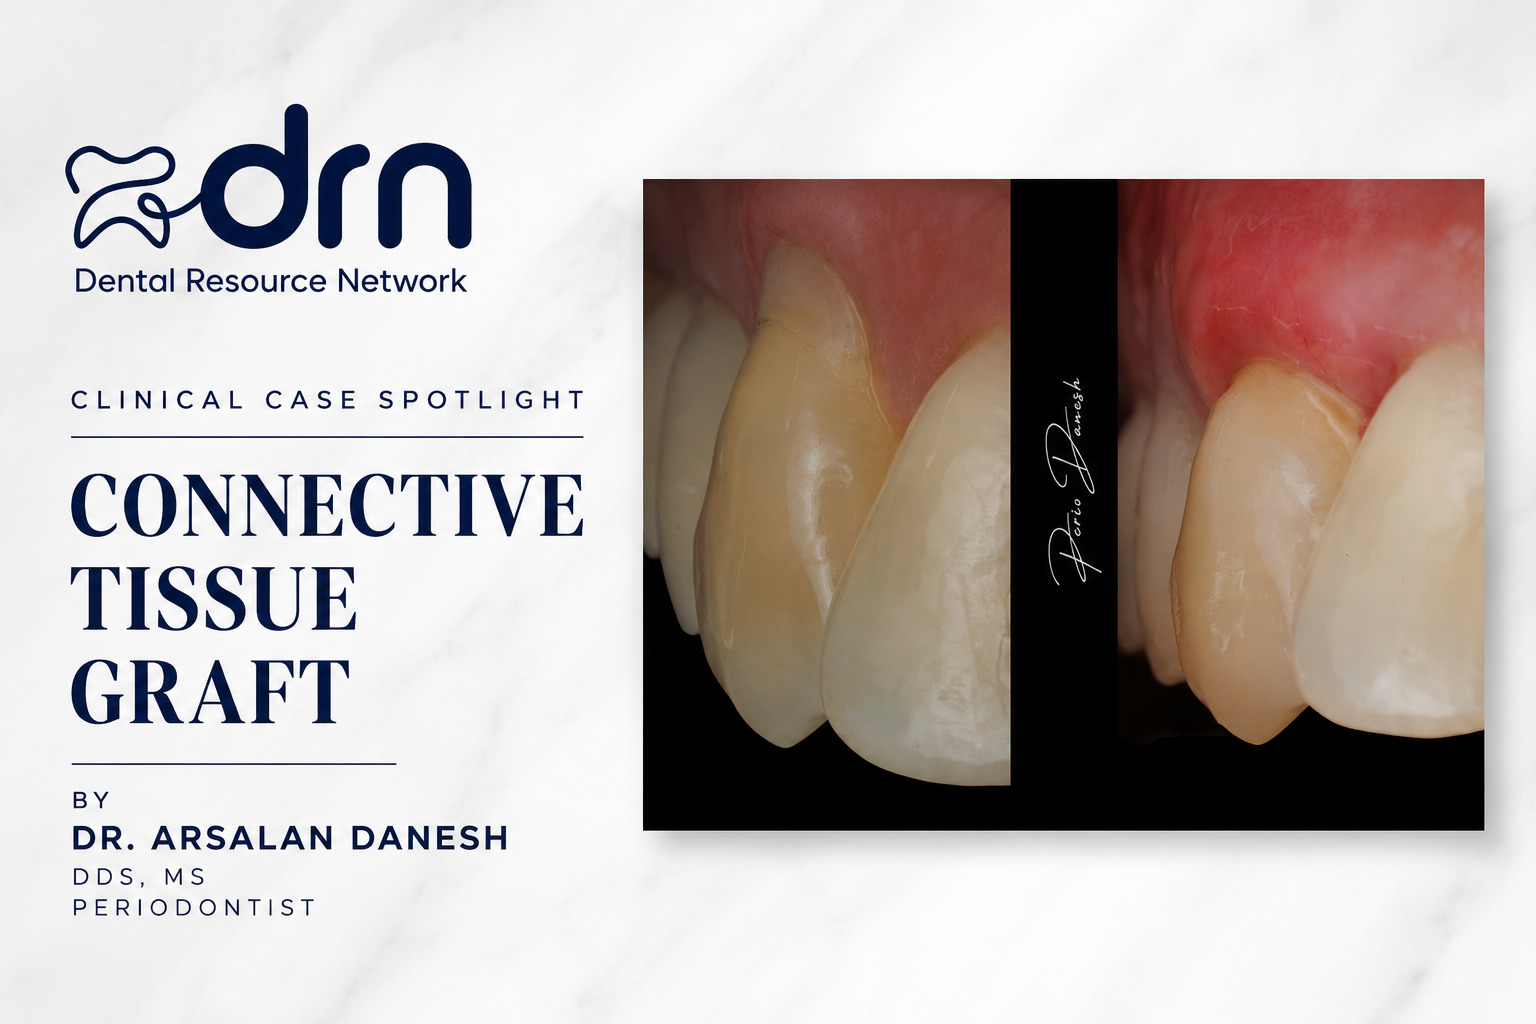
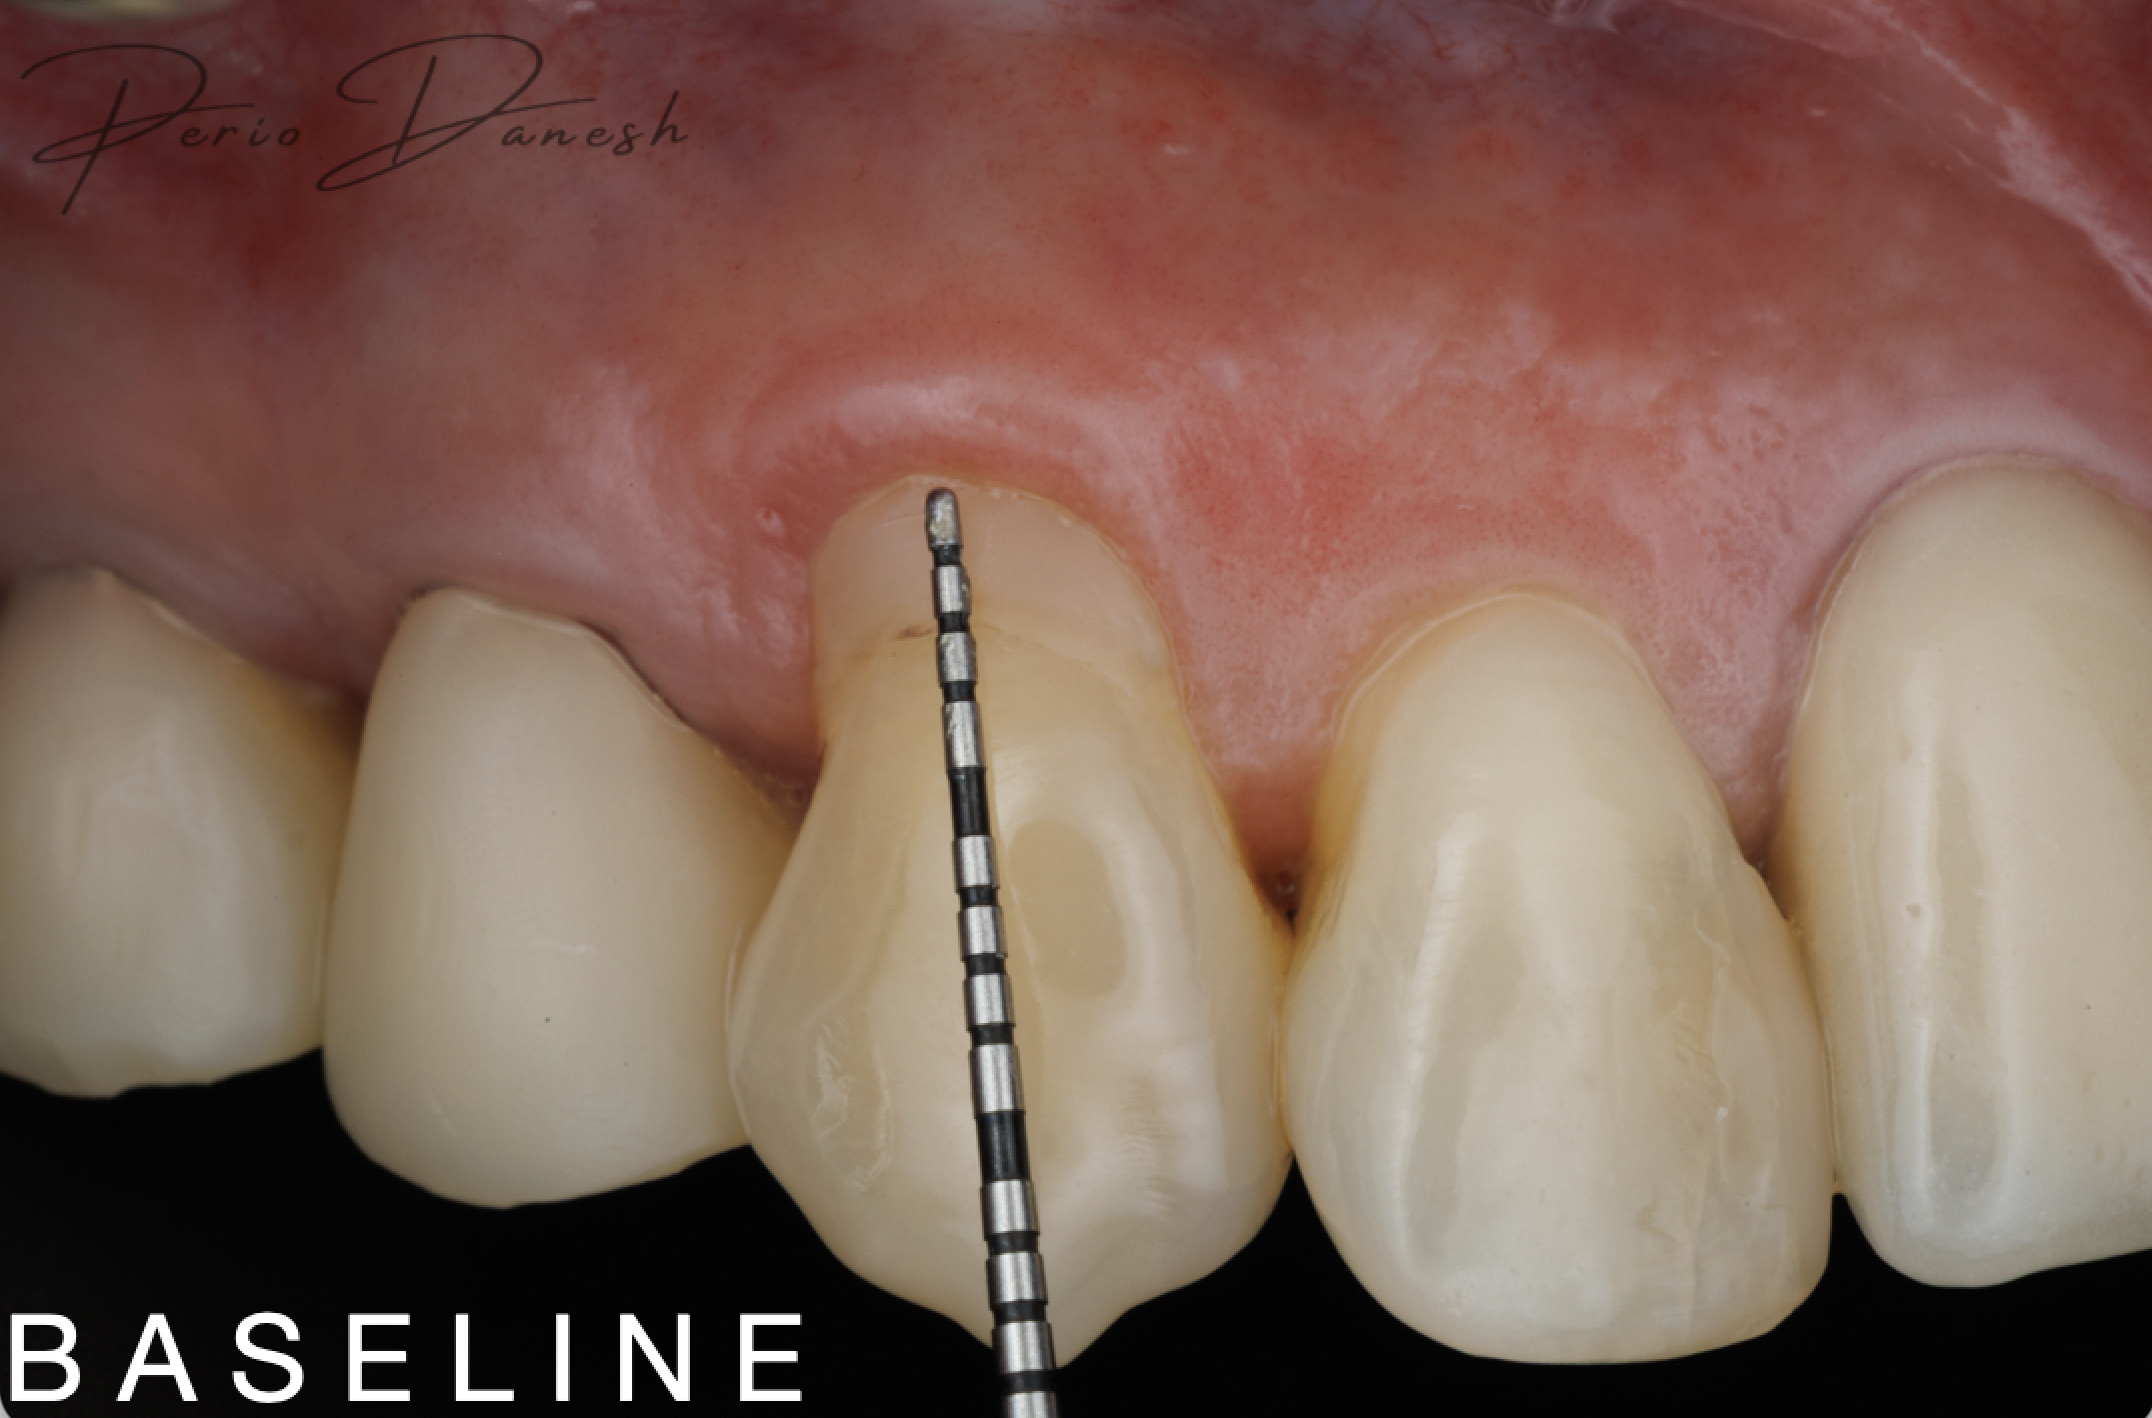
This week’s DRN Featured Clinical Case highlights the treatment of a localized gingival recession defect following an unsatisfactory Class V restoration.
The case was treated by Dr. Arsalan Danesh using a connective tissue graft to improve soft-tissue thickness, root coverage, and gingival contour. Arsalan Danesh
Clinical Presentation
The patient presented with a localized gingival recession defect associated with a previously restored Class V lesion.
The existing restoration and surrounding soft-tissue architecture presented both functional and esthetic concerns, with inadequate tissue thickness and recession affecting the gingival margin.
Treatment
A connective tissue graft procedure was performed to augment the soft tissue and address the localized recession defect.
The treatment objectives included:
- Increasing gingival tissue thickness
- Improving root coverage
- Establishing a more favorable gingival contour
- Creating a healthier and more stable soft-tissue environment
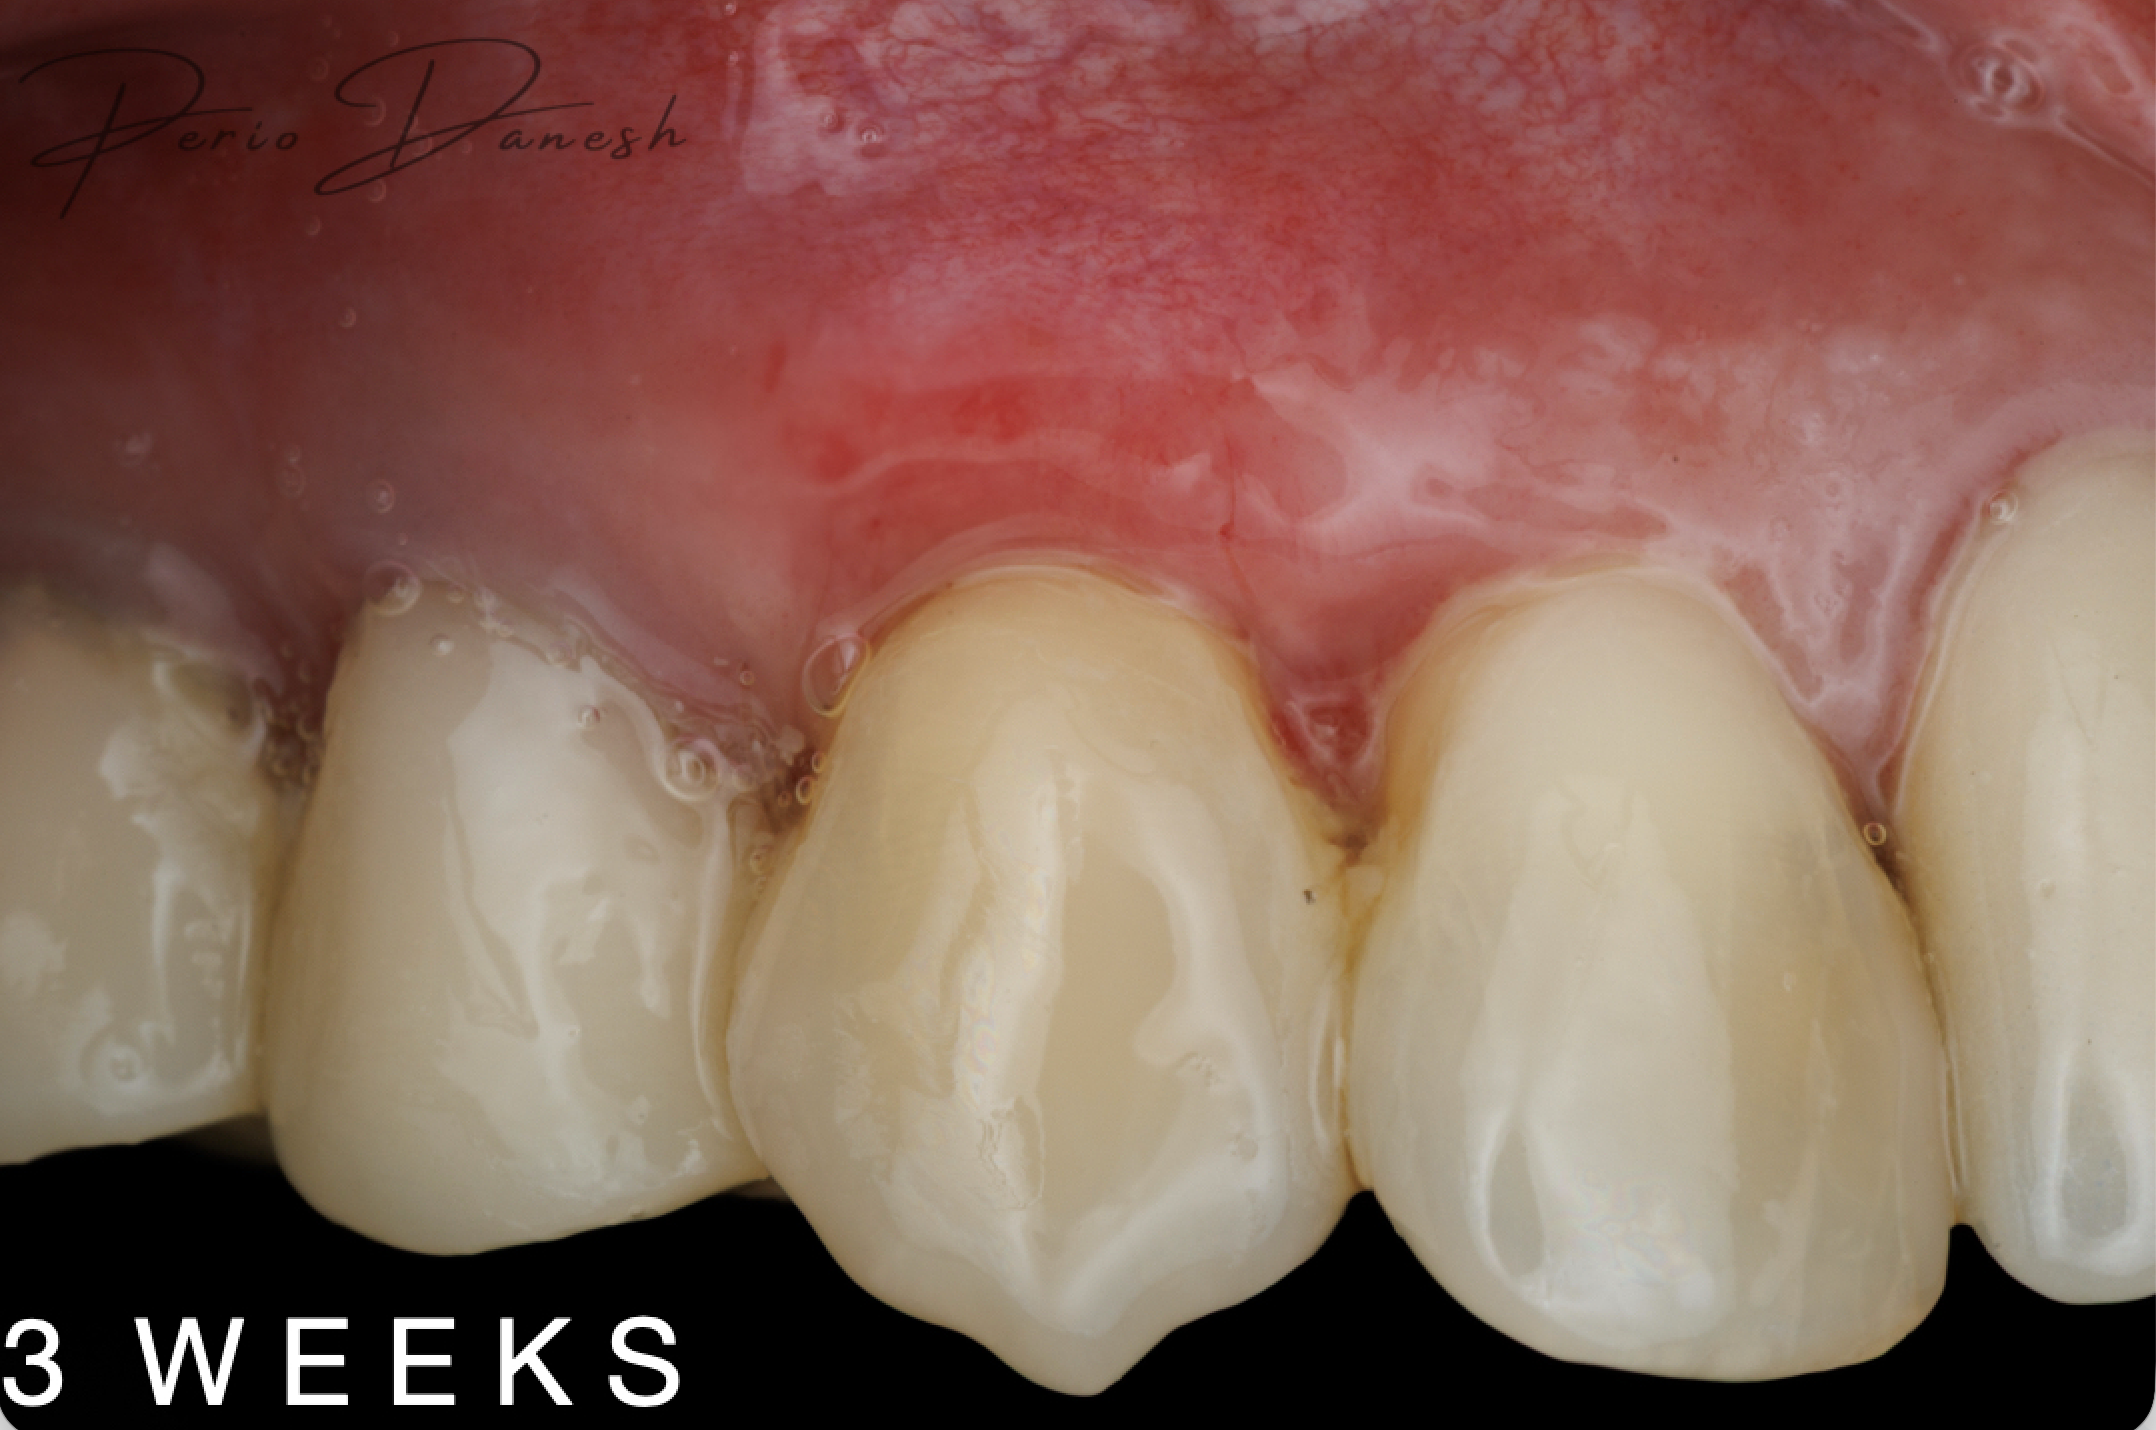
3-Week Follow-Up
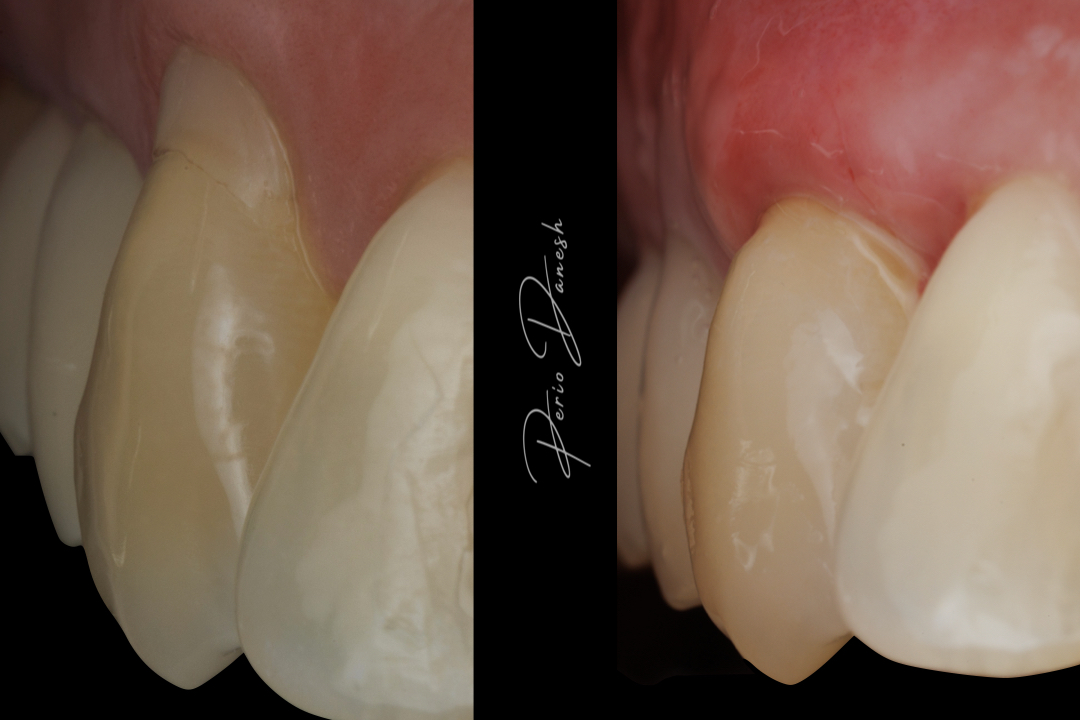
At the three-week postoperative evaluation, the site demonstrated early healing with noticeable improvement in tissue thickness, root coverage, and gingival contour.
While continued healing and maturation of the graft are expected, the early postoperative result demonstrates a favorable initial soft-tissue response.
Clinical Discussion
Cases involving gingival recession around previously restored cervical lesions can require careful management of both the restorative and periodontal components.
Connective tissue grafting can provide an effective approach for increasing tissue thickness and improving the soft-tissue architecture when appropriately indicated.
Long-term evaluation will ultimately determine the stability and maturation of the final result.
Featured Clinician
Dr. Arsalan Danesh
View Dr. Danesh’s profile on the Dental Resource Network and explore more clinical cases from dental professionals across the DRN community.
Have an interesting case to share?
DRN invites clinicians to contribute their cases, techniques, and outcomes to help create meaningful clinical discussion within the dental community.
Dental Resource Network
Connecting Dentistry. Sharing Knowledge. Advancing the Profession.
Crestal Approach Sinus Floor Elevation at Tooth #3 — Step-by-Step
Introduction
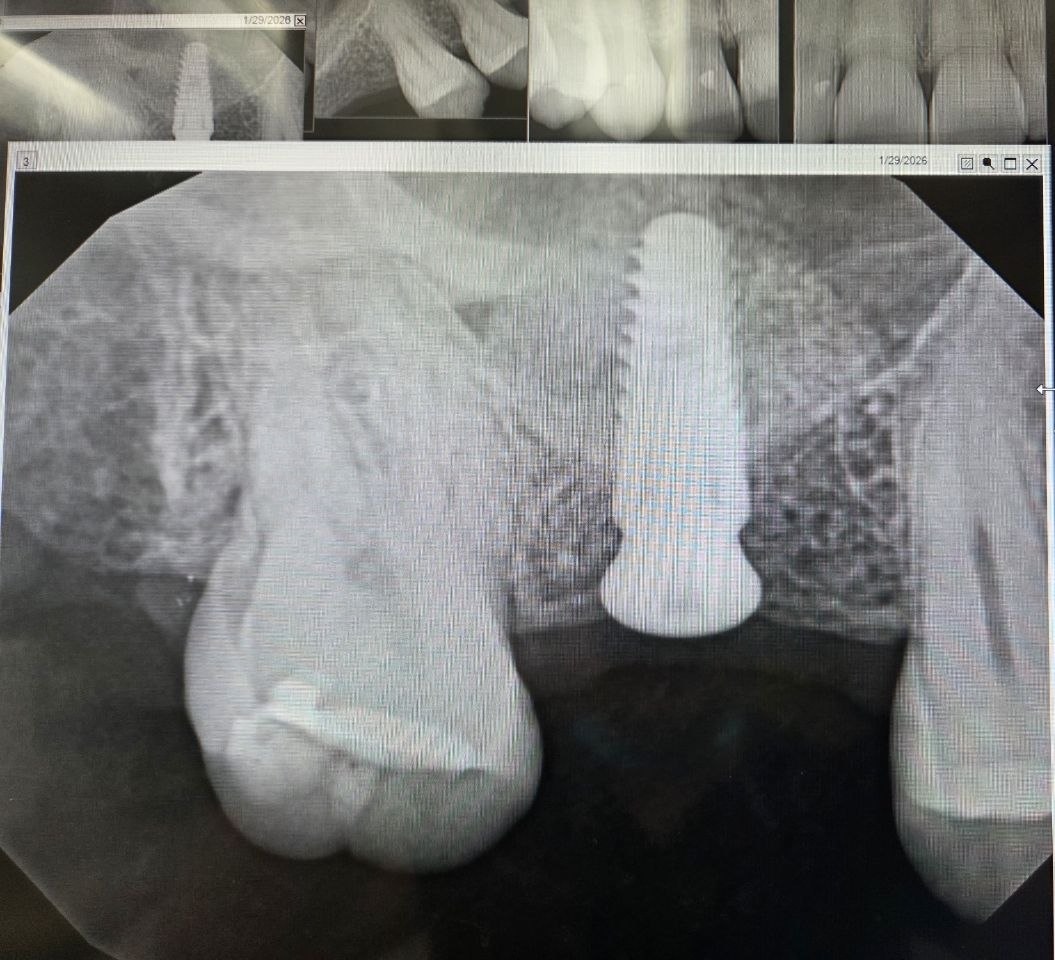
Tooth loss in the posterior maxilla is frequently followed by alveolar resorption and sinus pneumatization, leaving insufficient subantral bone for standard-length implants. Transcrestal sinus floor elevation (TSFE), first described by Tatum and modified by Summers, restores subantral height through the implant osteotomy itself, avoiding a lateral bony window and its associated morbidity. This case documents a single-site crestal approach at the maxillary right first molar (#3) with simultaneous implant placement.
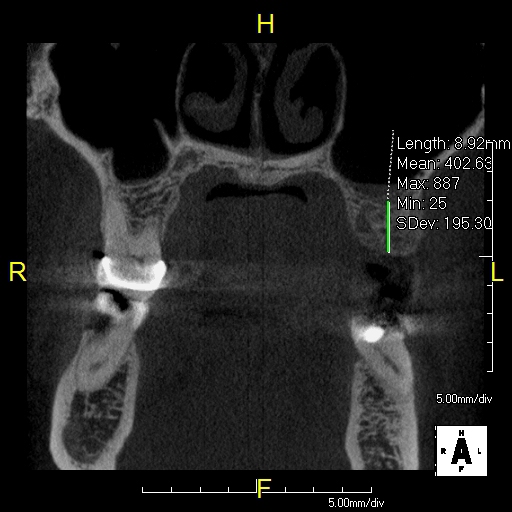
Step 1 — Diagnosis and 3D planning (Image: preoperative CBCT cross-section)
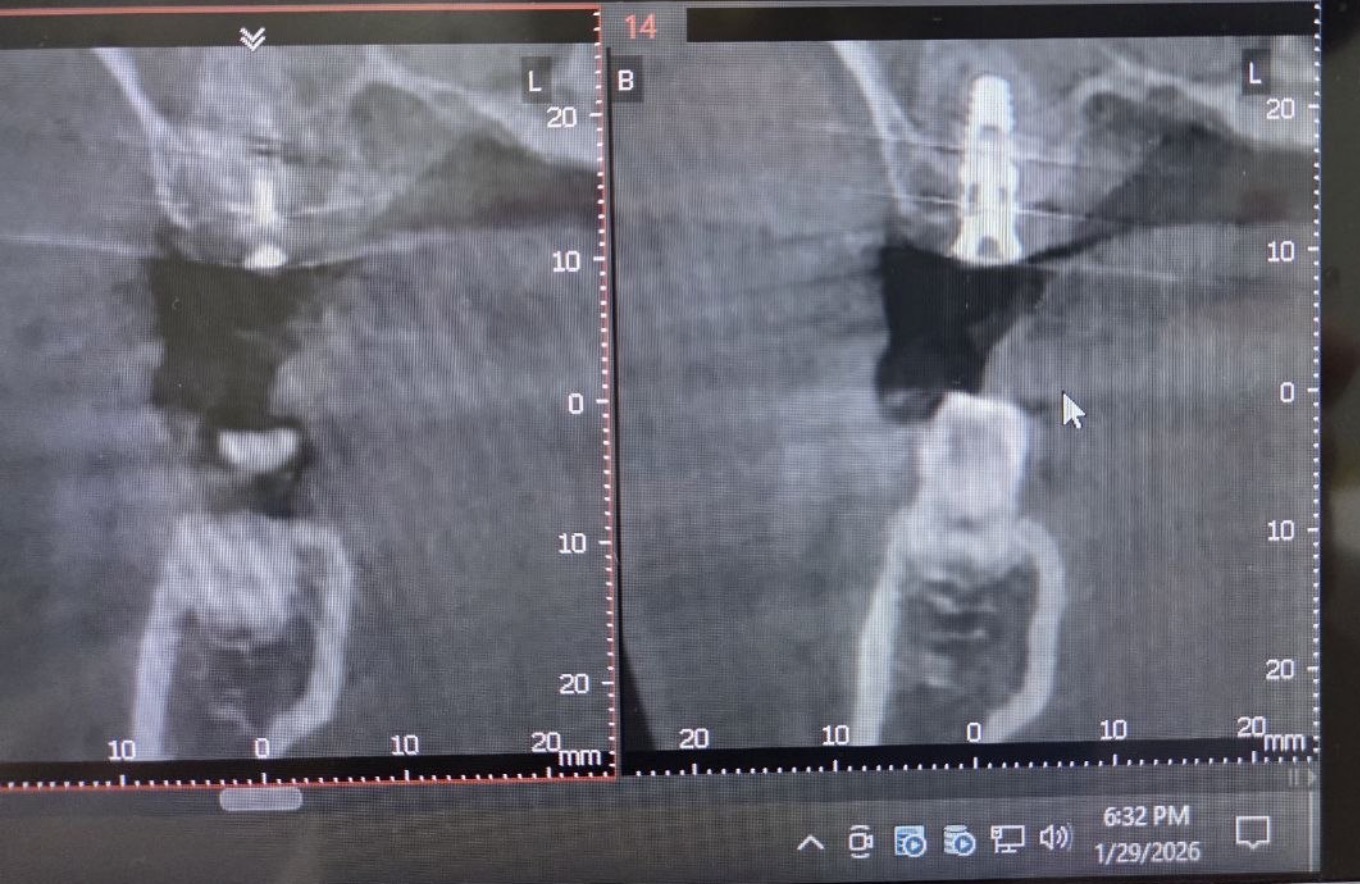
A cone-beam CT cross-section at #3 was obtained to measure residual bone height (RBH), bucco-palatal sinus width, and to rule out sinus pathology and septa. Case selection is critical: the crestal approach is best indicated for a single site with adequate ridge width and RBH generally ≥5 mm, where the planned elevation does not exceed ~3–4 mm. Narrow sinuses (bucco-palatal width ≤12 mm) are more predictable and carry lower perforation risk than wide sinuses. An intact Schneiderian membrane and a relatively flat sinus floor without septa were confirmed as prerequisites for a predictable "blind" elevation.
Step 2 — Flapless linear-incision access
The procedure was performed flapless. Under local anesthesia, a linear crestal incision was made over the #3 site and gently opened; the access was enlarged to expose the alveolar crest sufficiently for direct visualization of the osteotomy entry point, without raising a full mucoperiosteal flap and without a tissue punch. This minimally invasive access preserves the periosteal blood supply and soft-tissue architecture while still allowing controlled instrumentation. Osteotomy preparation then followed the standard drilling protocol and was advanced to within approximately 1–2 mm of the sinus floor, as measured on CBCT, preserving a thin shelf of cortical floor beneath the intact membrane.
Step 3 — Controlled fracture of the sinus floor
The residual floor was in-fractured atraumatically. Depending on operator preference, this is achieved with sequential osteotomes of increasing diameter producing a green-stick fracture, or with dedicated protective/atraumatic drills or piezoelectric inserts designed to reduce perforation risk. Osteotome condensation additionally increases the density of the soft posterior maxillary bone, enhancing primary implant stability.
Step 4 — Membrane elevation and integrity check
The Schneiderian membrane was gently detached and displaced cranially. Because access is indirect, membrane elevation is performed hydraulically (saline), with an injectable/granular biomaterial, or via osteotome pressure, and membrane integrity is verified through the osteotomy and with a Valsalva maneuver. A depth gauge was used to confirm adequate subantral space and assess membrane tension. Membrane perforation is the most common intraoperative complication (reported up to ~7% in low-RBH series and higher in wide sinuses); a significant tear would prompt conversion to a lateral window approach.
Step 5 — Grafting the subantral space (Image: periapical radiograph showing the apical dome)
A deproteinized bovine bone mineral graft (particle size 0.25–1 mm) was incrementally introduced through the osteotomy to elevate and support the membrane, creating the characteristic radiopaque apical dome seen on the periapical film. Grafting supports the elevated membrane and maintains subantral space, though evidence indicates that the secluded blood-filled chamber beneath an intact membrane can also support new bone formation with or without added filler.
Step 6 — Simultaneous implant placement (Images: periapical and CBCT/periapical series)
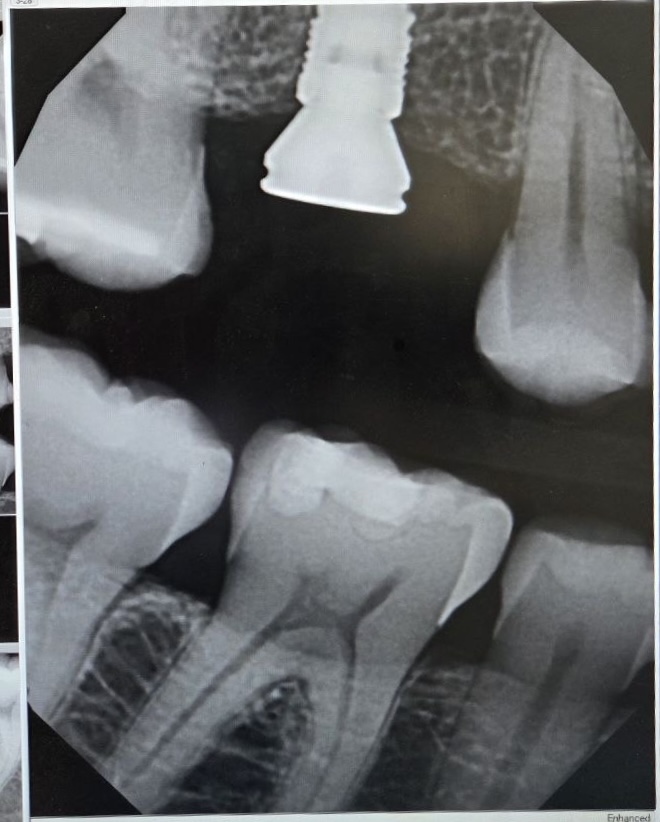
The implant was placed simultaneously, achieving adequate primary stability from the residual crestal bone and the condensed osteotomy walls; the implant apex projects into the grafted dome, consistent with the follow-up radiographs demonstrating graft consolidation circumferentially around the implant apex. Simultaneous placement is standard when primary stability is sufficient and is associated with more stable postoperative height.
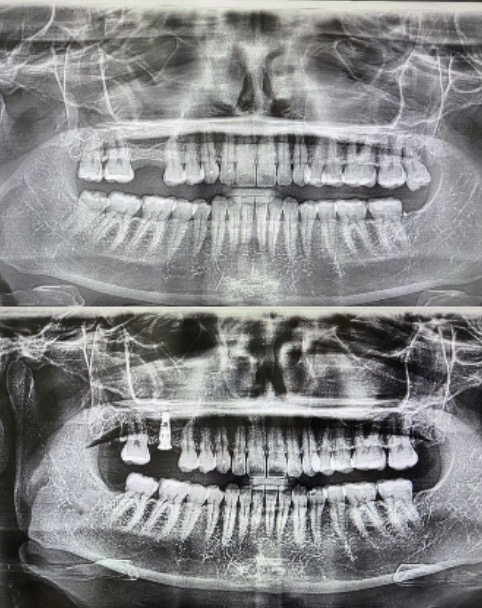
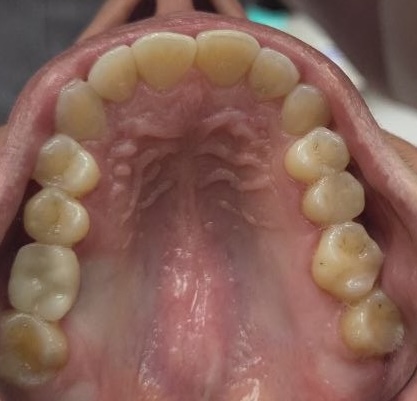
Step 7 — Closure, prosthetic context, and follow-up (Images: occlusal clinical view; pre/post panoramic radiographs)
The linear incision was closed with tension-free suturing, and a baseline radiograph was obtained for future comparison. The occlusal view documents the restored maxillary arch and the prosthetic environment of the #3 site, and the pre/post panoramic pair illustrates the augmented subantral bone supporting the integrated implant. Timing of loading and abutment connection is individualized according to residual bone volume, bone quality, and primary stability.
Discussion / Outcomes
The crestal approach offers reduced surgical trauma, less postoperative morbidity, shorter healing, and completion of augmentation and implant placement in a single visit compared with the lateral window. A flapless linear-incision access further limits soft-tissue trauma while maintaining direct access to the osteotomy site. Reported implant survival with the osteotome technique is approximately 95.8% at 5 years, with higher survival above 5 mm RBH (96.9%) than below (92.7%). The principal limitations are the indirect ("blind") nature of membrane elevation and a finite achievable elevation; meticulous technique and preservation of an intact membrane remain the key determinants of a predictable outcome.
Connective tissue graft for treatment of a localized gingival recession defect following an unsatisfactory Class V restoration.
3-week follow-up. Early healing with improved tissue thickness, root coverage, and gingival contour.
🦷 VERIFIED CLINICAL CASE | DRN
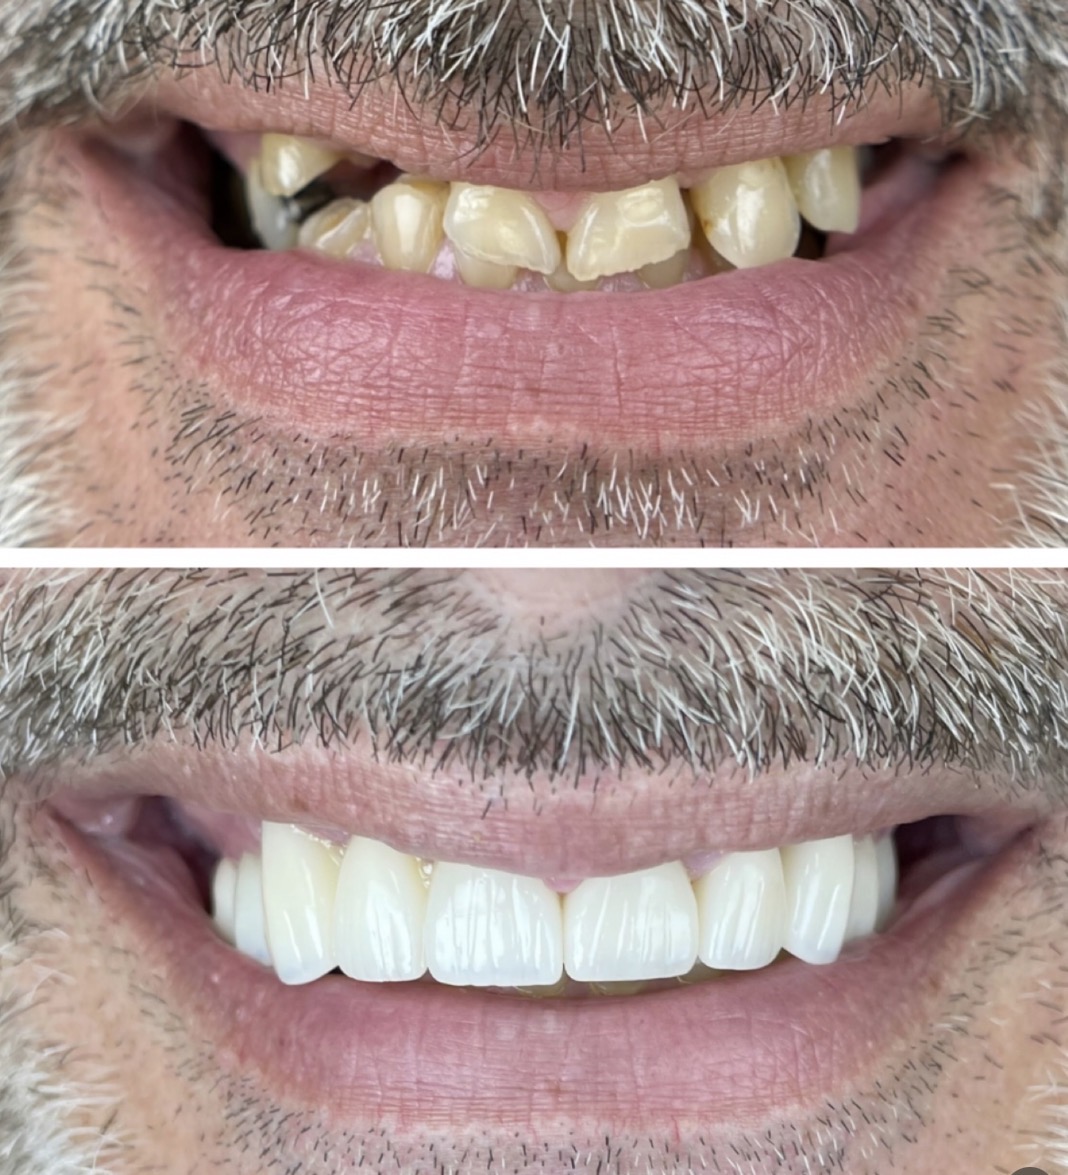
Full-Mouth Reconstruction — Monolithic Zirconia
Dr. Pedro Miguel completed a comprehensive full-mouth rehabilitation using monolithic zirconia crowns, restoring function, tooth proportions, smile symmetry, and a stable, balanced occlusion.
🔹 Full-mouth reconstruction
🔹 Monolithic zirconia — Shade A1
🔹 Functional & aesthetic rehabilitation
🔹 Comprehensive digital treatment planning
👉 View Dr. Miguel’s complete case, treatment approach & clinical discussion on DRN:
https://dentalresourcenetwork.org/dental/space/dental-before-and-after/post/full-mouth-reconstruction-monolithic-z
Contact Pedro Miguel directly to set up an appointment and change your smile today!
#DentalResourceNetwork #FullMouthRehabilitation #DentalImplants #RestorativeDentistry #ClinicalDentistry
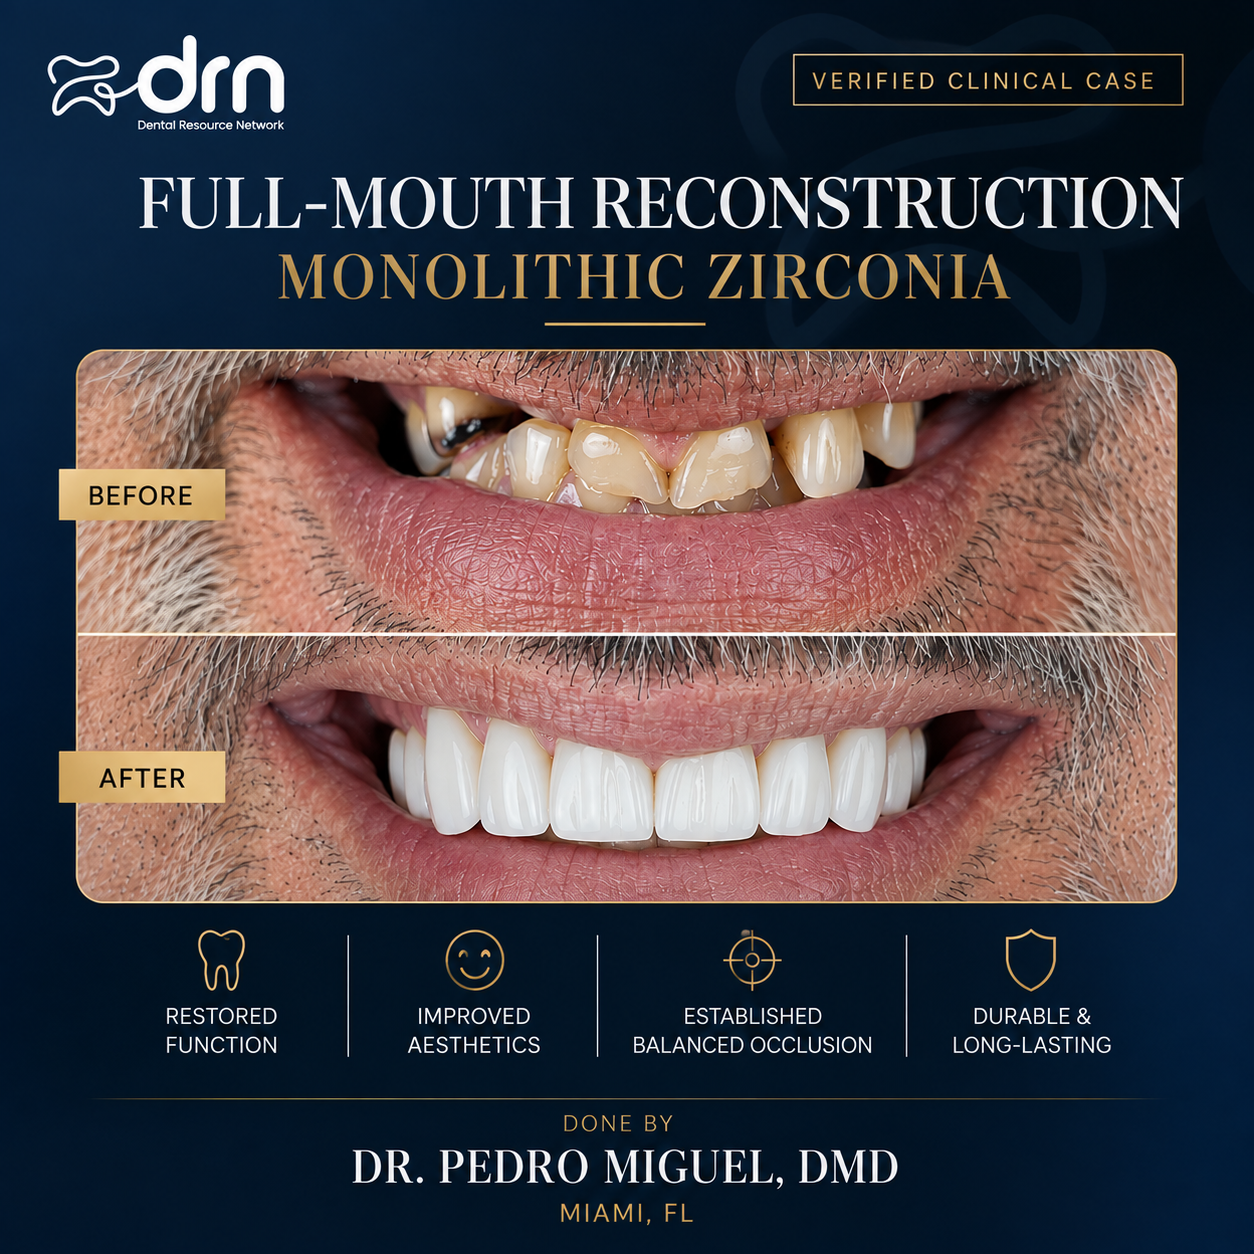
Full-Mouth Reconstruction — Monolithic Zirconia.
dental-before-and-after
Presentation: An adult male presented with compromised function and an unaesthetic , globally worn dentition. Clinical findings included generalized incisal and occlusal wear, chipping, irregular incisal edges, spacing, mild rotations and malalignment, and generalized discoloration. Loss of appropriate tooth proportions and smile symmetry contributed to a worn and aged appearance, indicating the need for comprehensive rehabilitation.
Chief Complaint: The patient desired to restore both function and aesthetics.
Treatment: A full-mouth reconstruction was completed using full-coverage monolithic zirconia crowns in shade A1. The workflow included comprehensive diagnostic records, smile design, shade selection, full-coverage preparation of both arches, and provisionalization to evaluate aesthetics, phonetics, occlusion, and patient comfort. The definitive restorations were delivered with careful attention to the dental midline, incisal-edge position, tooth proportions, gingival harmony, and the establishment of a stable, balanced occlusion.
Outcome: Treatment improved tooth proportions and smile symmetry, established a harmonious incisal plane, closed the existing spaces, and created a brighter, more balanced smile. Functional occlusion was re-established, and the patient reported being highly satisfied with both the aesthetic and functional outcome.
Discussion Points for Colleagues: The use of monolithic zirconia in full-mouth rehabilitation; management of the vertical dimension of occlusion (VDO); preparation a nd cementation protocols; selection of the occlusal scheme; material durability; and long-term maintenance, including night-guard protection.
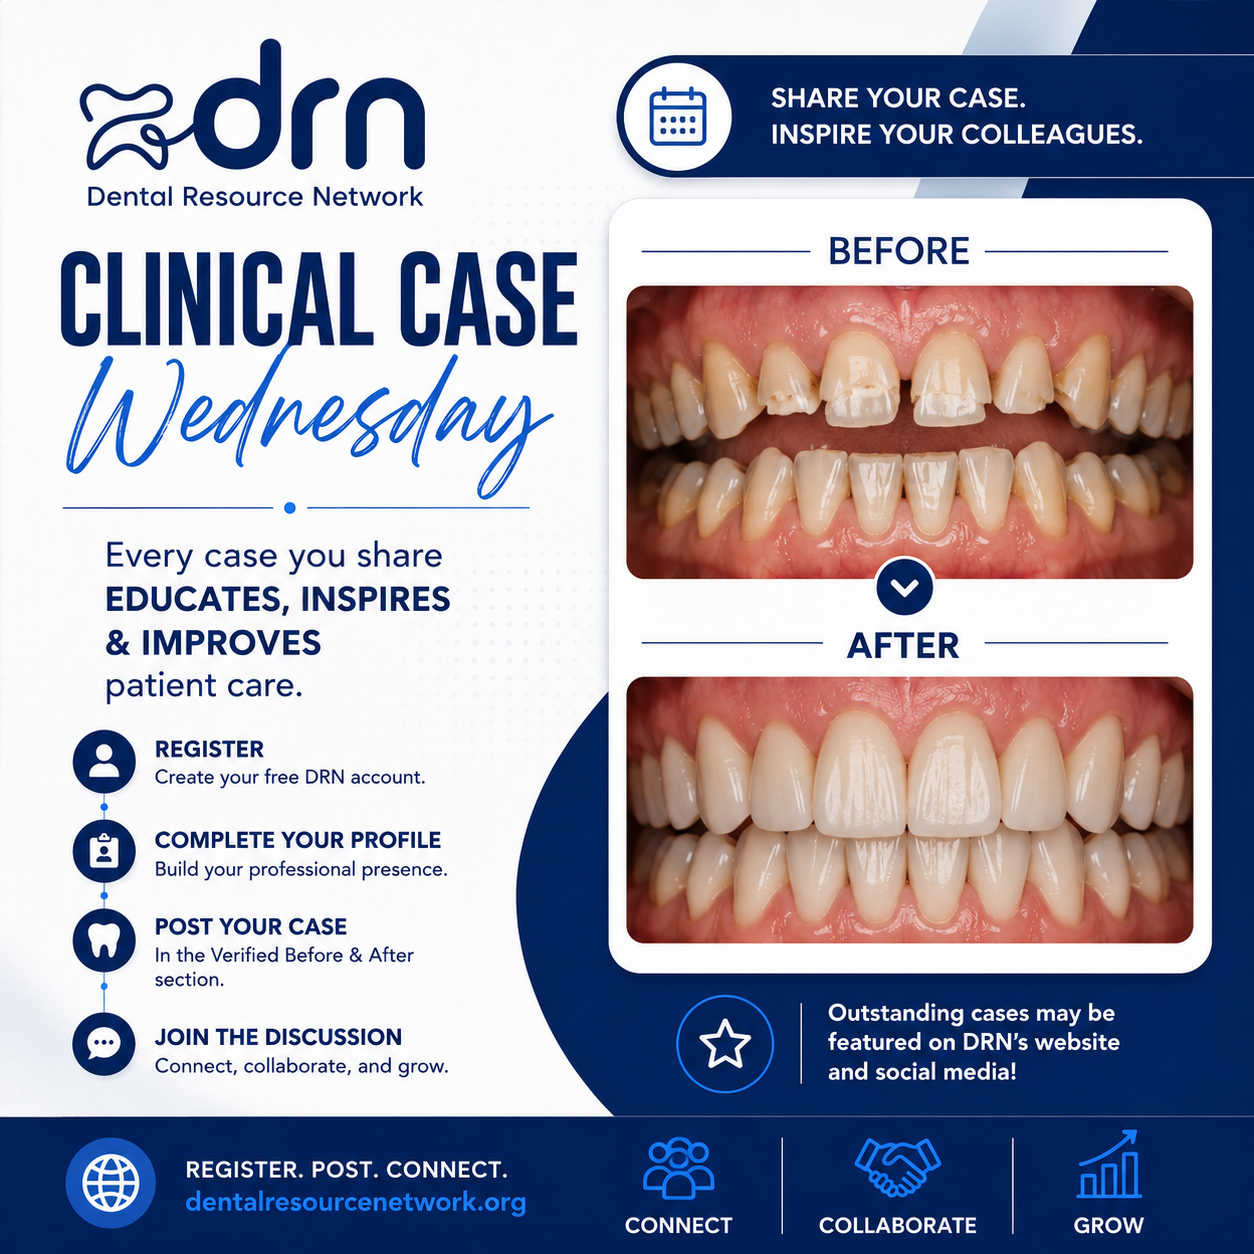
🦷 CLINICAL CASE WEDNESDAY
Every great case has the power to educate, inspire, and advance our profession.
Have a clinical case you're proud of?
📌 Post it in the Verified Before & After section on Dental Resource Network or share it in our DRN WhatsApp Community to start a professional discussion and let patients see your expertise.
Each Wednesday, DRN will feature outstanding clinical cases across our:
✔️ Website
✔️ Instagram
✔️ LinkedIn
✔️ Facebook
This is your opportunity to showcase your work, contribute to the profession, and increase your professional visibility.
👉 Register. Complete your profile. Post your case. Join the discussion.
https://dentalresourcenetwork.org
Connect. Collaborate. Grow.
#DentalResourceNetwork #ClinicalCase #Dentistry #BeforeAndAfter #DentalEducation

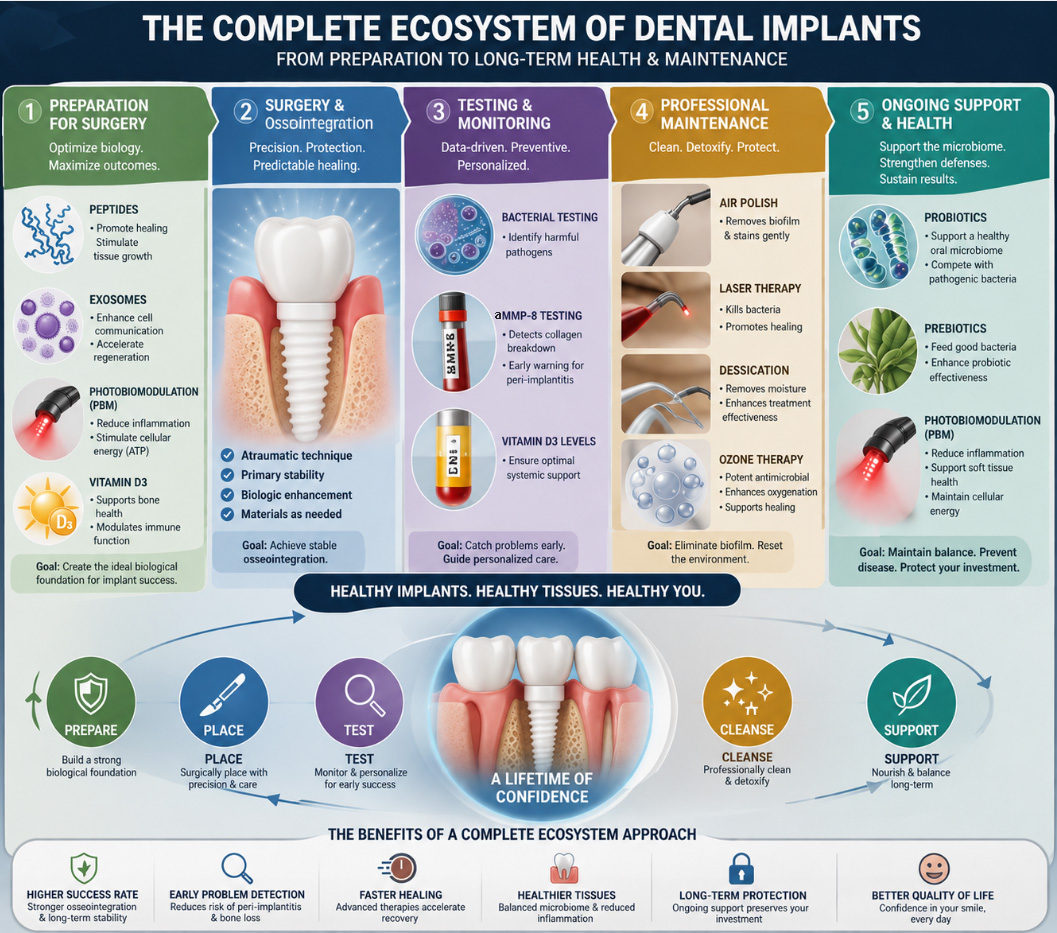
It's not only about the implant system, surface or brand. Implants are required to function in a biological and dynamic environment. From preparation to long term function biology plays a very important role in the success of dental implants. Dr. Thomas Larkin will discuss this extensively at the upcoming Ceramic implant congress in September 2026. For more information on the event and this topic in particular go to: https://www.iaoci.com/iaoci-annual-congress/
🧑🎓📖
Join us at the 2026 Annual Ceramic Implant Congress, September 10-12, 2026!
Register Today: https://www.iaoci.com/iaoci-annual-congress/
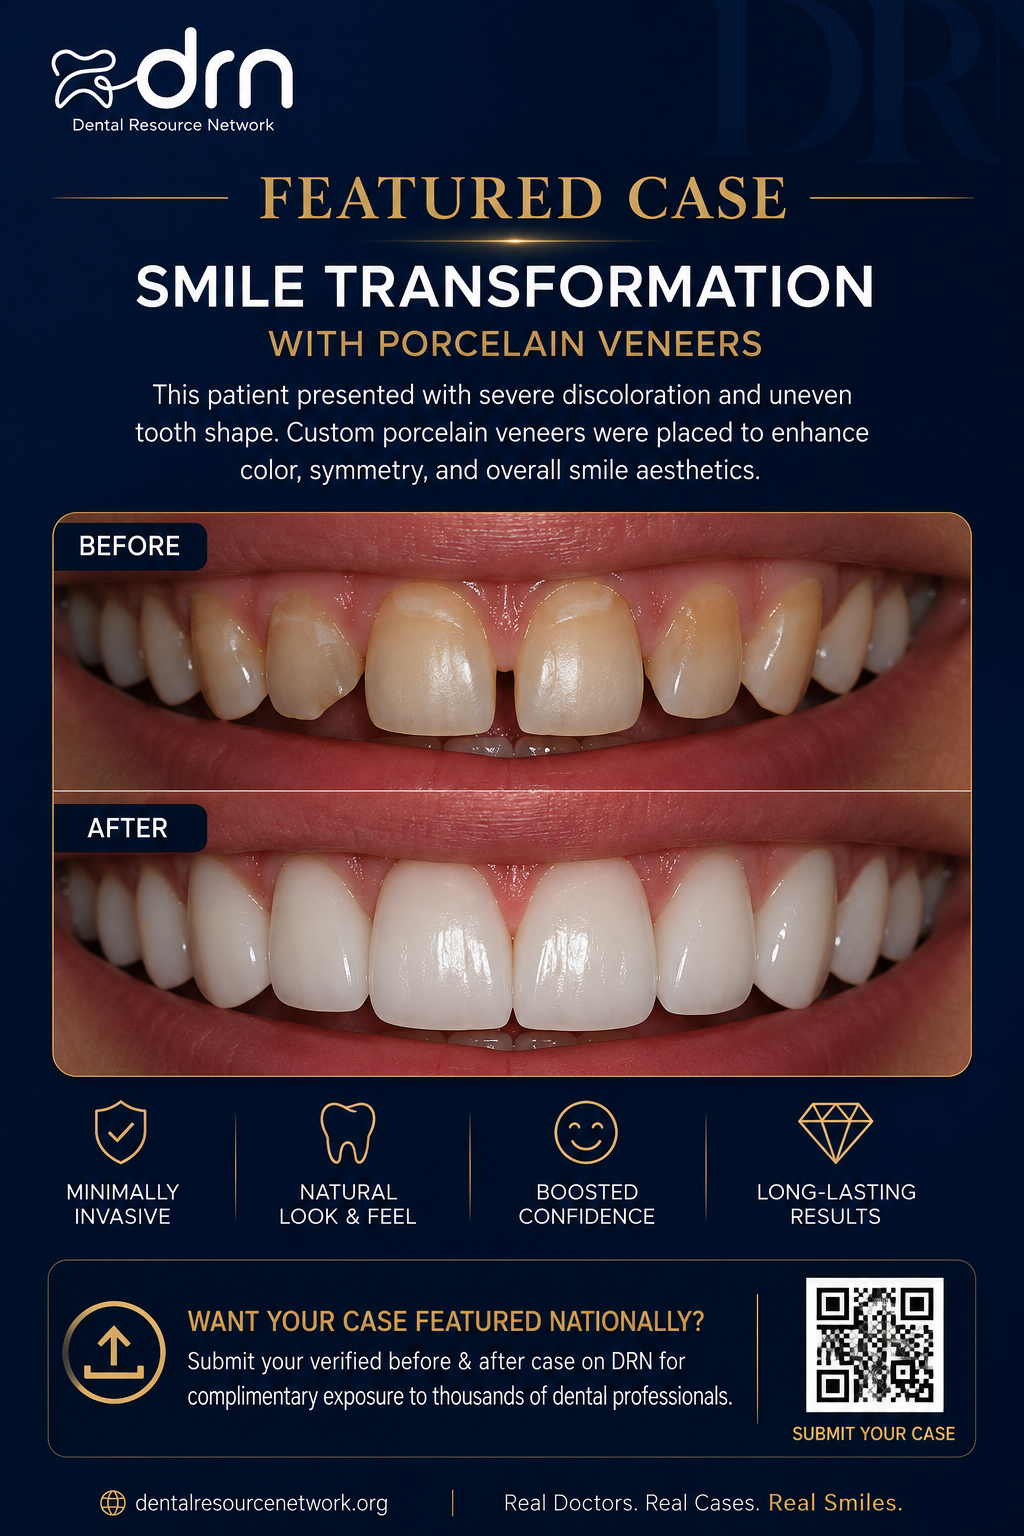
🦷 Introducing Verified Before & After Cases
Every smile has a story—and every great clinician has cases worth sharing.
Dental Resource Network is launching Verified Before & After Cases, a dedicated space where dentists can showcase their best clinical work, gain national exposure, and inspire colleagues across the profession.
Whether it's veneers, implants, full-arch rehabilitation, orthodontics, periodontal therapy, or smile makeovers, your work deserves to be seen.
Want to be featured?
Upload your verified before-and-after cases on DRN and join a growing community of clinicians advancing dentistry through education and collaboration.
📸 Show your work.
🌎 Build your reputation.
🦷 Inspire the profession.
👉 Submit your first case today.
#DentalResourceNetwork #BeforeAndAfter #SmileTransformation #CosmeticDentistry #ImplantDentistry #DigitalDentistry #Dentist #DentalCommunity
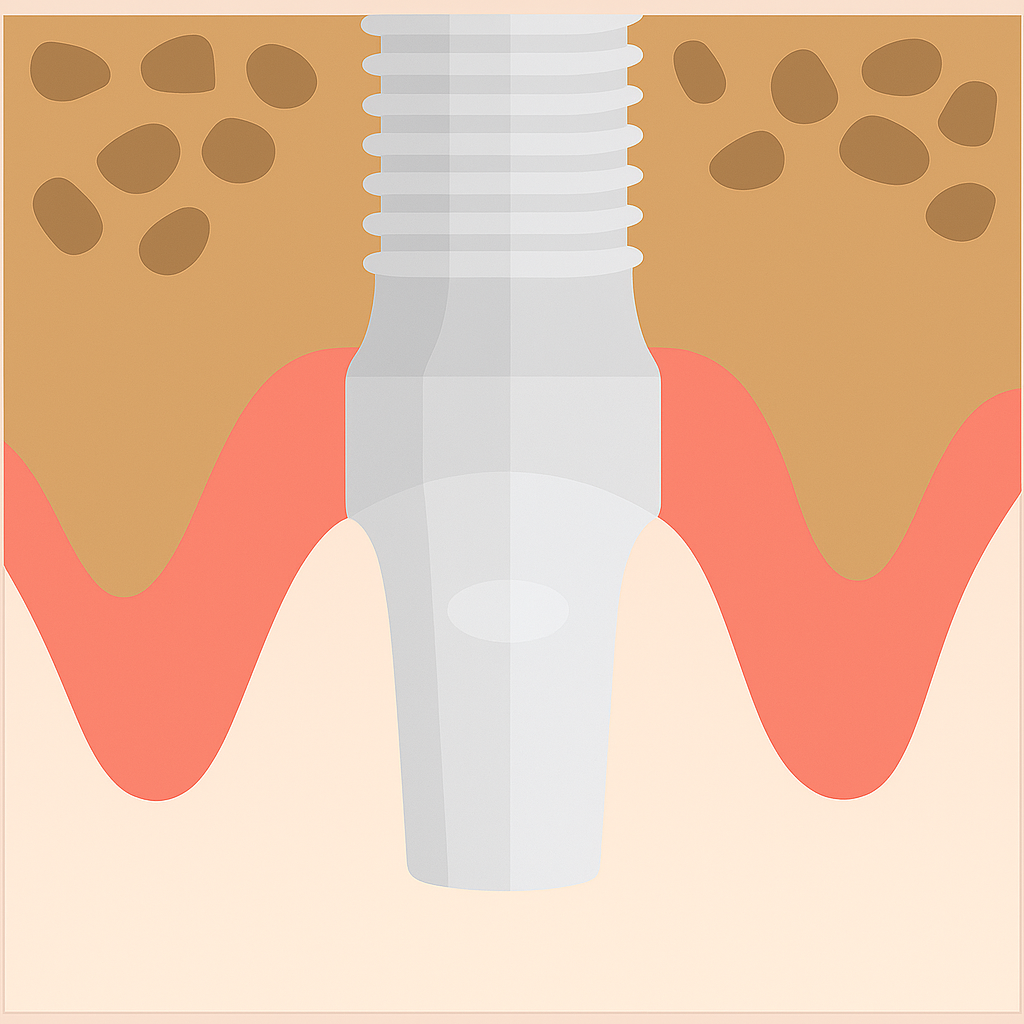
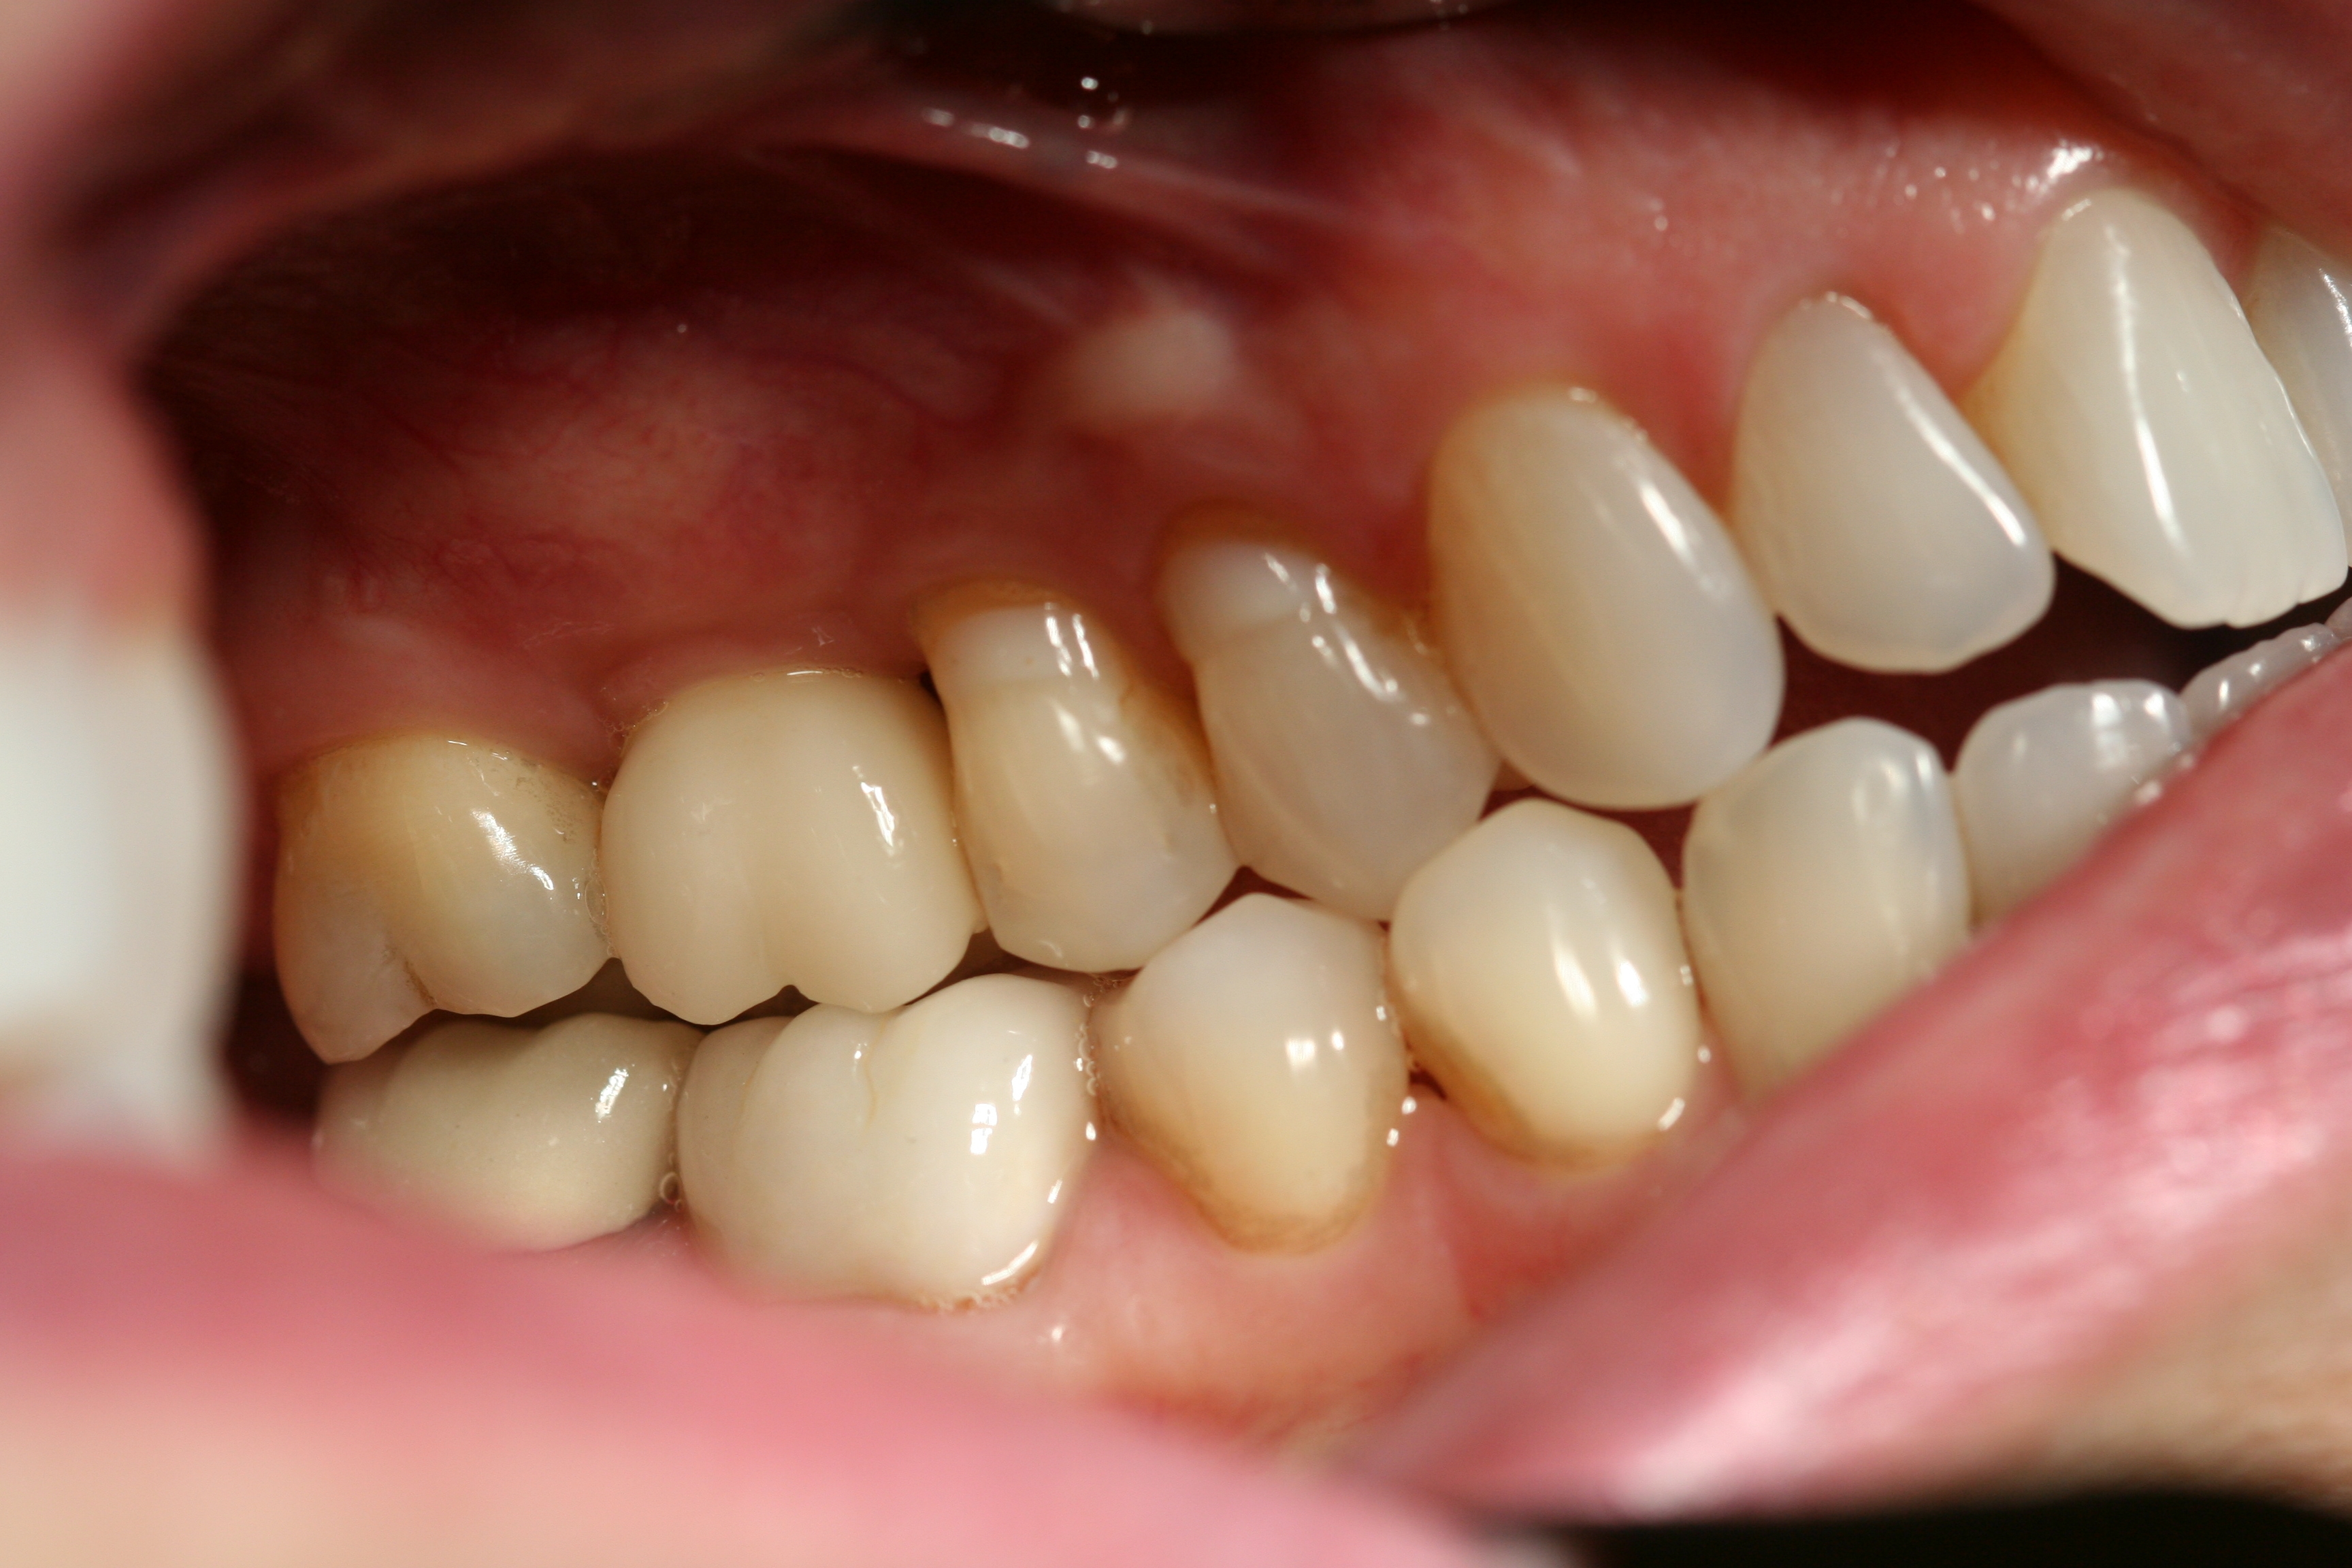
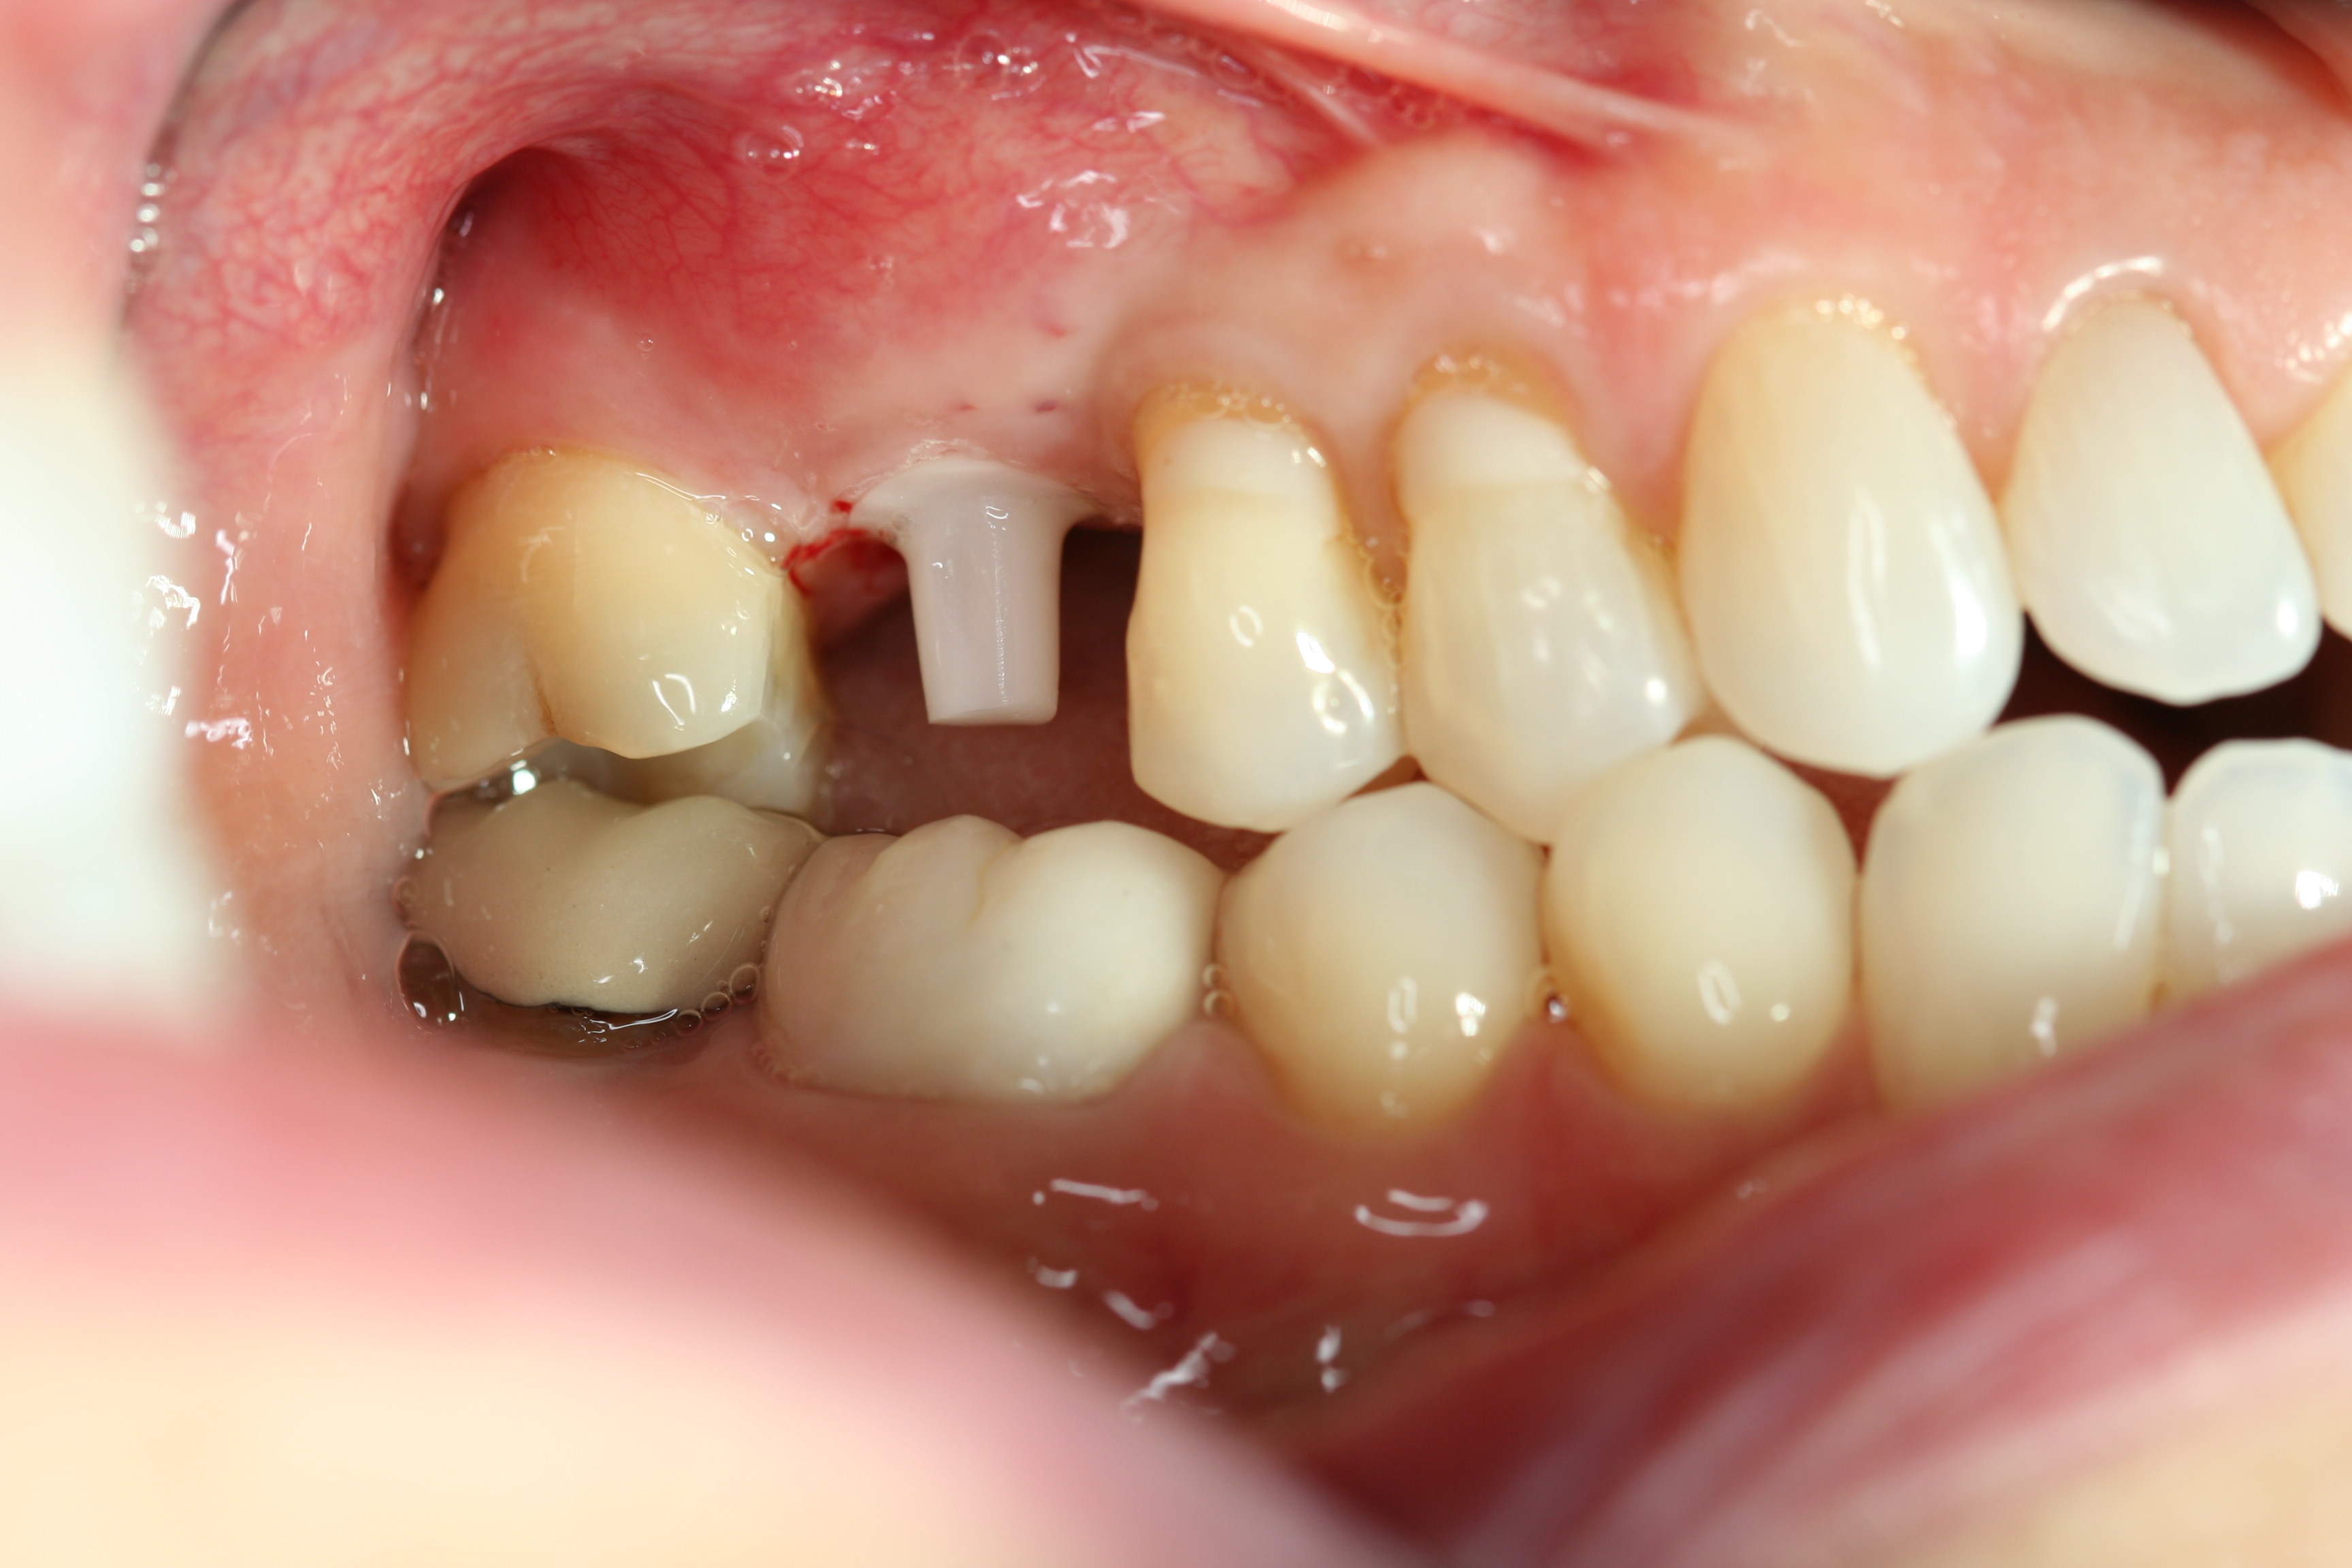
This is the replacement of a maxillary left premolar. This a situation where there will be delayed implant placement after a combination of vertical ridge augmentation and internal sinus floor elevation. A tissue-level one piece ceramic implant was placed and allowed to osseointegrate like conventional dental implants for four months. At the start of the prosthetic phase the supragingival abutment and prosthetic tulip portion of the implant was prepared bringing the margin to the gingival line. A full contour zirconia crown was cemented using RMGI cement.